Ski Touring in Australia
Where do you start? Where are you at? It’s not our intention to be prescriptive about your progression. The following are some thoughts and observations on the Australian backcountry skills development culture.
The goal is that with collective feedback from that community we can create a resource that you could share with entry level participants to help them make solid decisions both, in the backcountry, also at the retailers and around the interwebs.
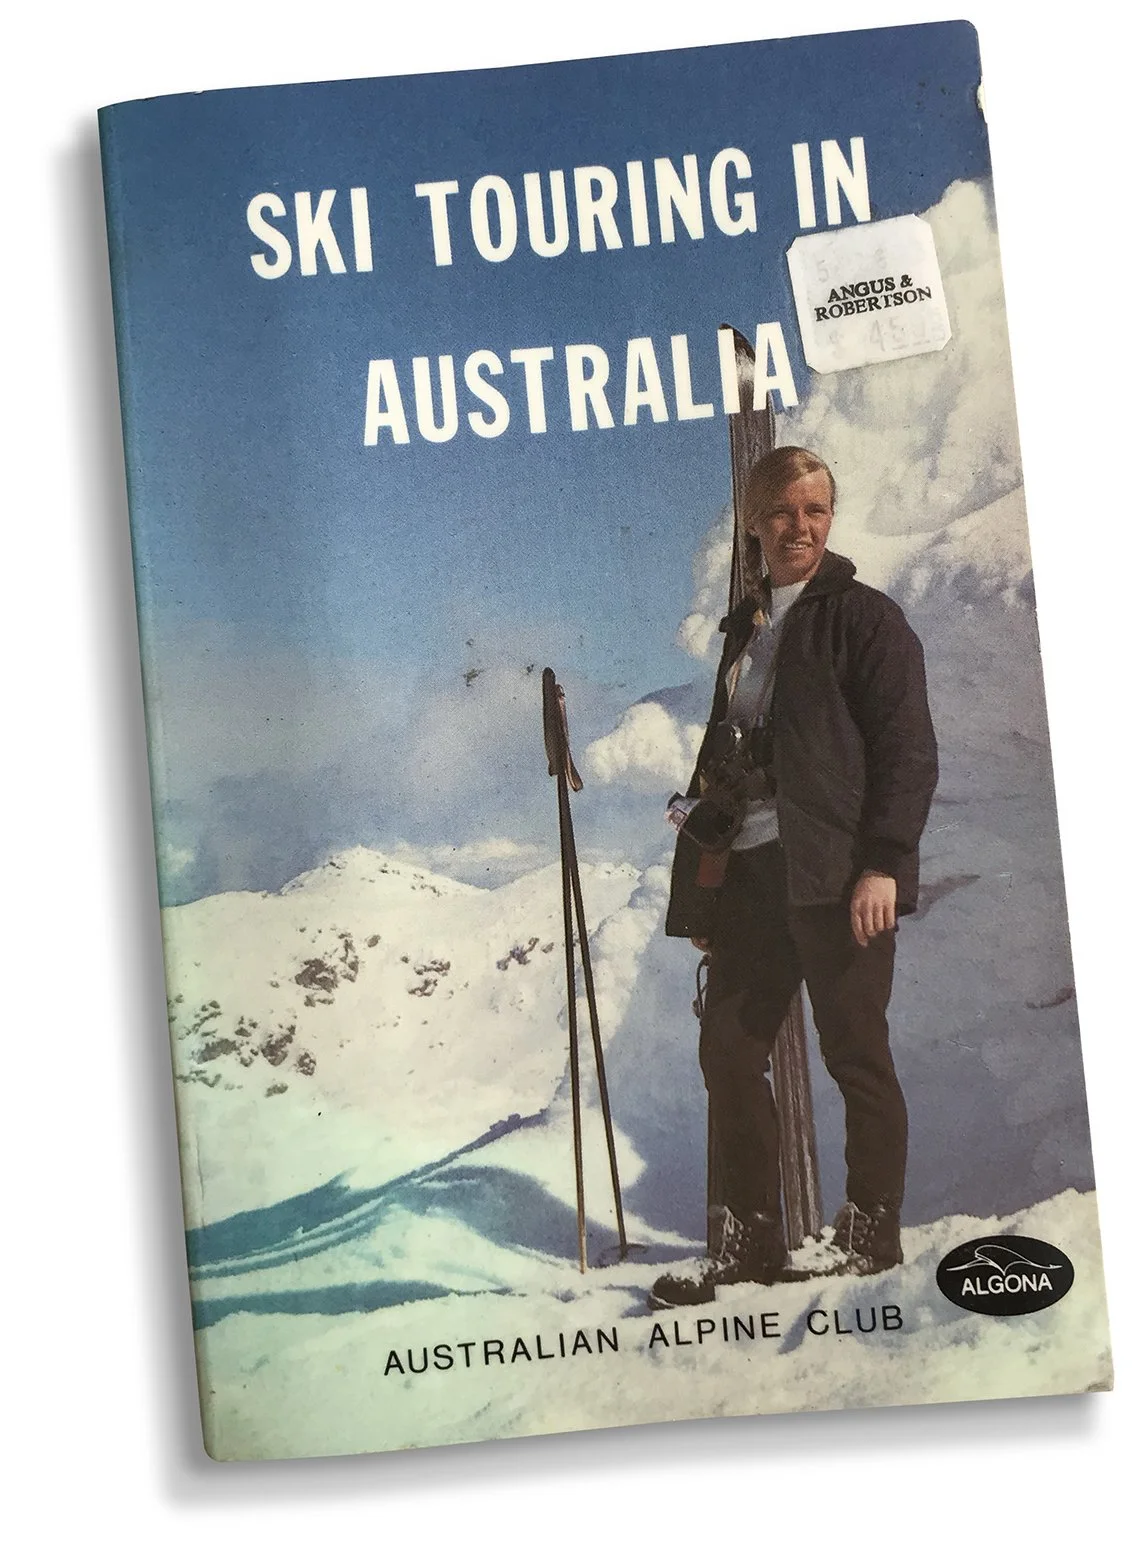
The inspiration comes from the original ‘Ski Touring In Australia’ from the early 1970’s. The publication dates back to a time when backcountry skis were fat and people were fit. Lift companies didn’t have wholesale ownership of ski participation, meanwhile exploration and adventure was a strong motivation in the hills. On reading it, the information and tour notes felt as though we have come full circle. Some things have changed, some has stayed the same. These pages are a contemporary review of this original tome. Now, as a live document which we can shape and develop over time.
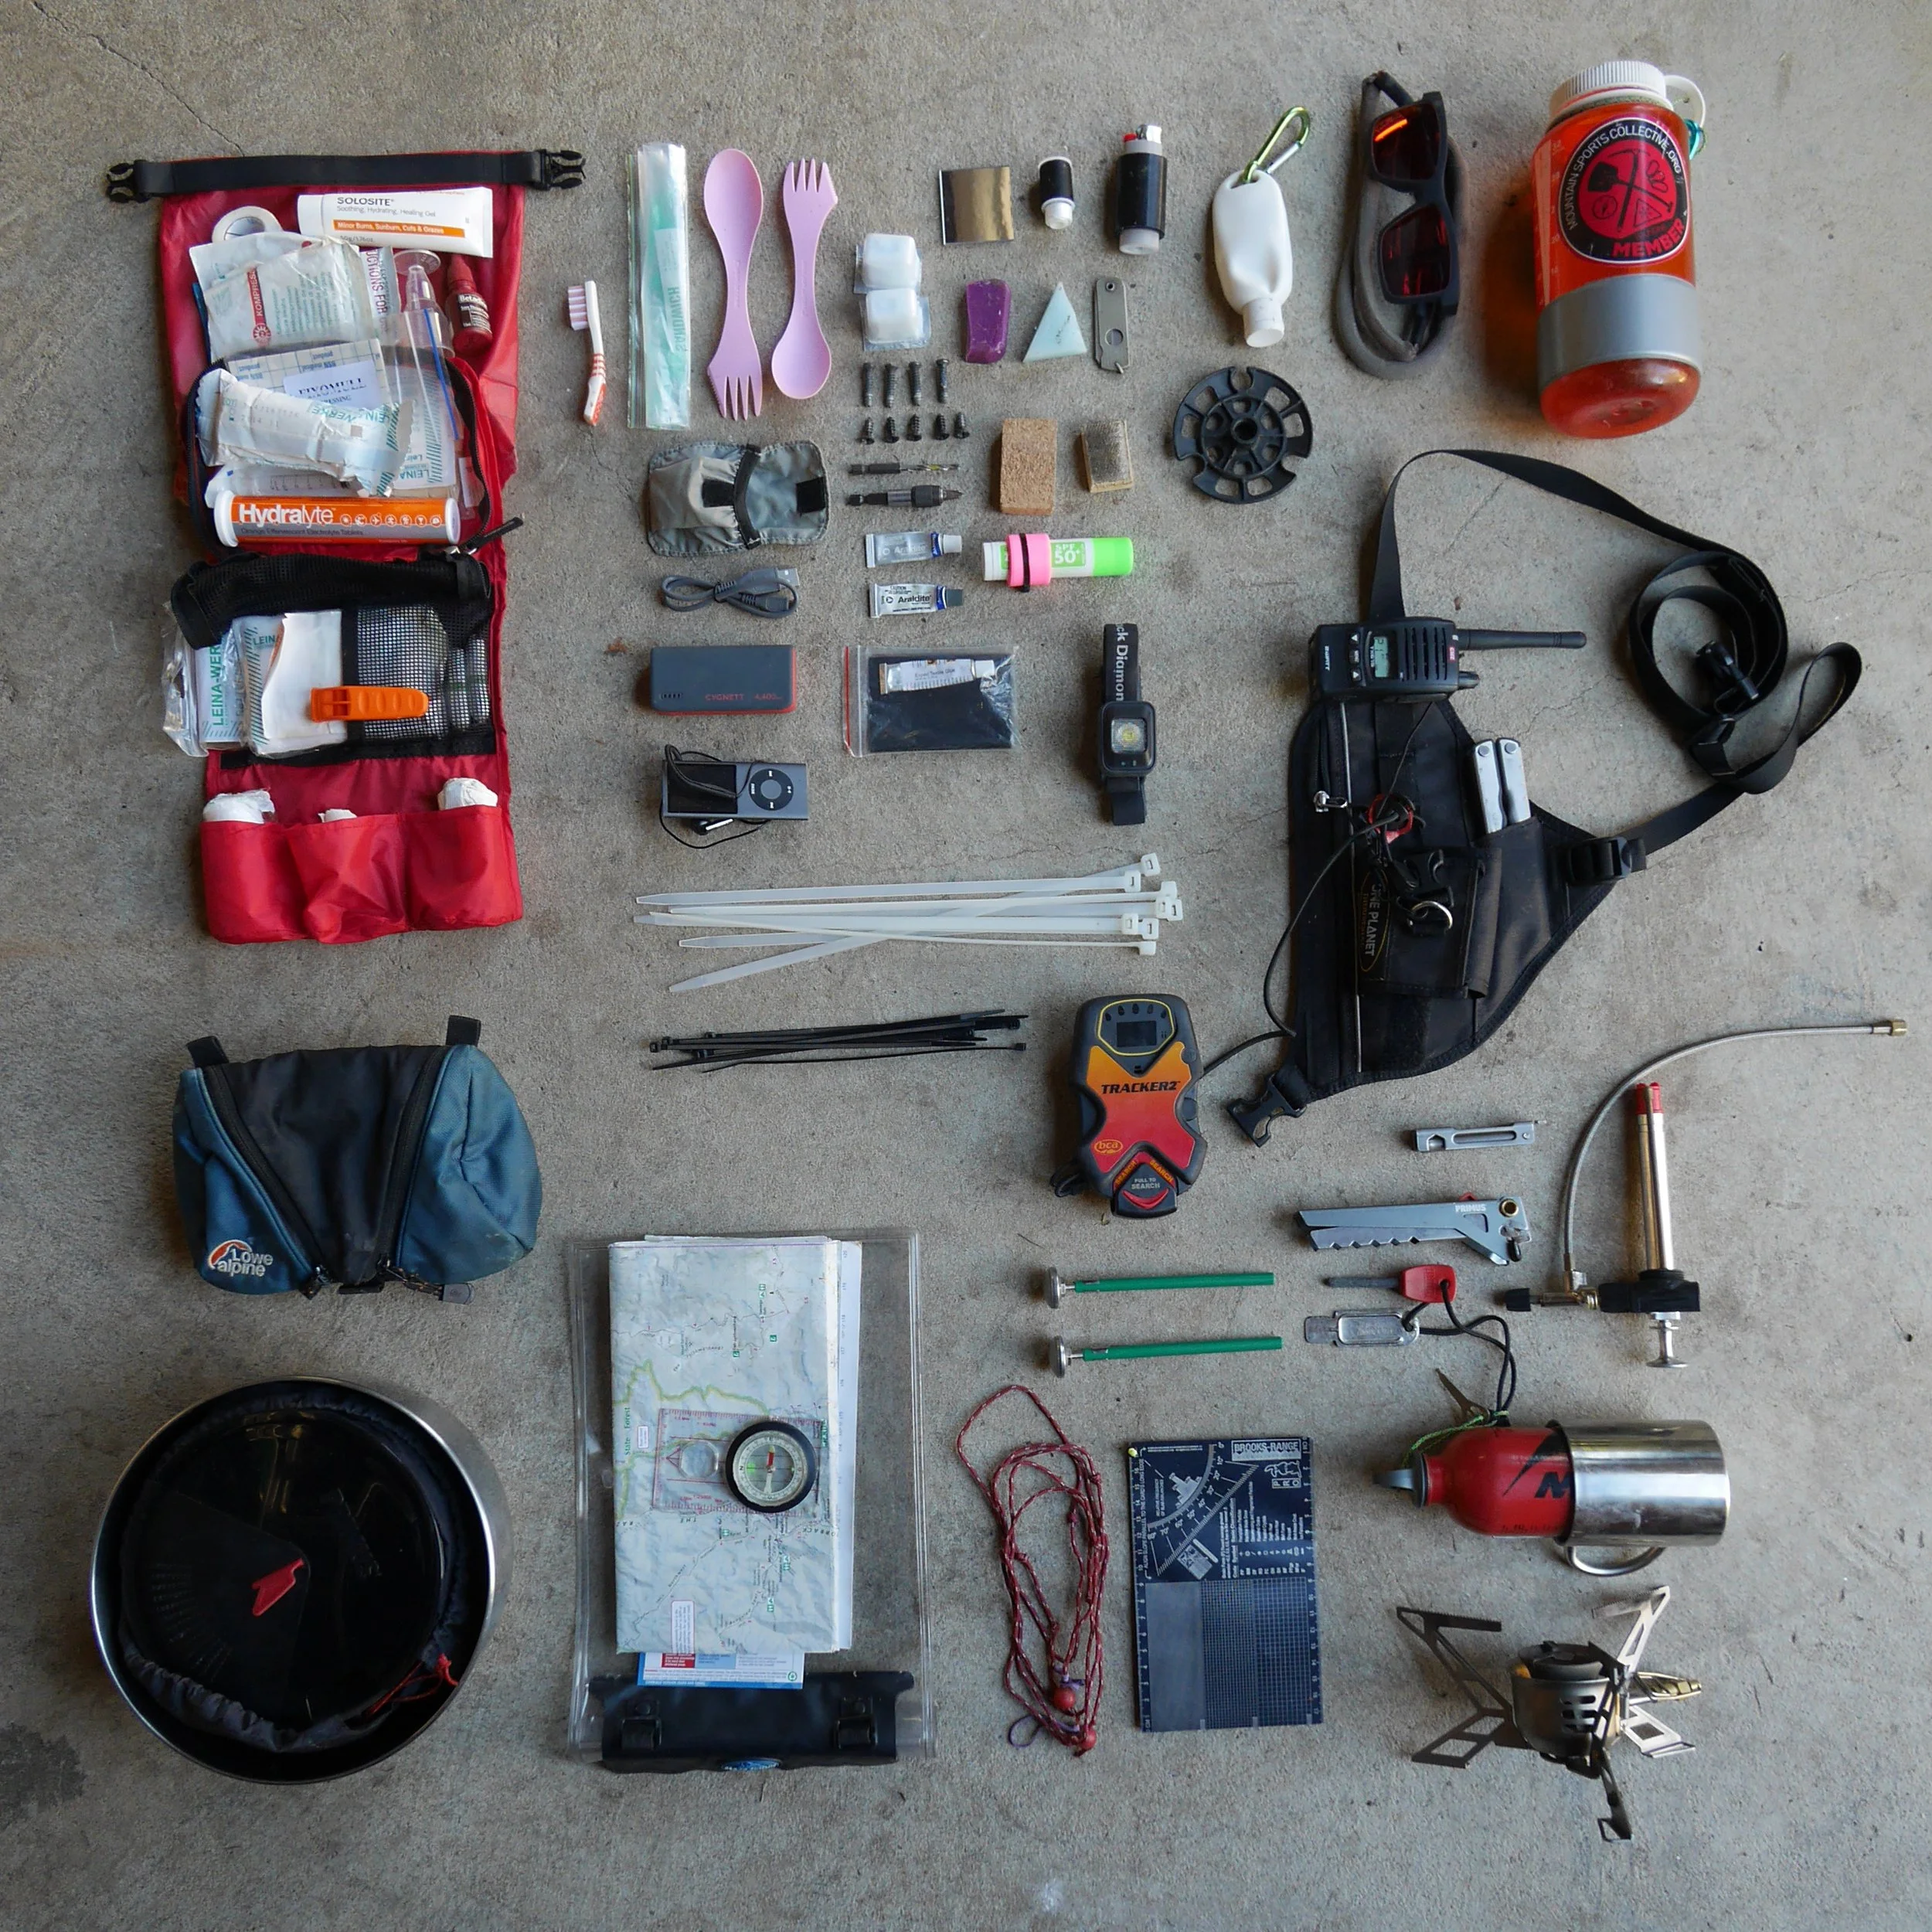
Hardware
This section sets parameters of what is proven to perform in the Australian backcountry. Every mountain range has its nuances and here’s the gear that works best.
How quickly things have changed. Following a contraction in participation in ski touring through the 90’s and early 00’s we are now experiencing an unprecedented boom in the backcountry thanks largely to two functional developments. Touring bindings and split boards.
Both lighter and stronger than ever before. Telemark still ranks an honourable mention and certainly on some tours covered in this book, lightweight pattern base telemark is a great solution to the challenges of undulating terrain. Largely the efficiencies of cross country travel in the alpine, afforded by new technology must be appreciated for its simplicity and reliability by comparison to the days of old. Outlined here are the hardware characteristics available to enable safe ski/split touring experience
Tech Bindings and NTN (New Telemark Norm)
In general terms these are much the same thing. A binding with the ability to ‘free-heel’ to enable an uphill climbing mode. Traditionally the telemark binding was ‘always free’ (a philosophical position) yet currently these too, as with tech alpine touring bindings have the option to fasten the heel (formerly referred to as the ‘frankenmark’ binding).
Both incorporate an under boot ski crampon and a variety of heel riser devices to aid on long ascents. The only real difference being a gusseted bellow on the telemark boot to enable contact of the forward sole of the boot, and not the heel in the crouched telemark position of that famous turn. We all grew up on the old 75mm version and whilst it is irrefutable that every turn down the hill in a telemark style is actually a divine ascent to the astral plane, the lack of uniformity and ‘bossy-ness’ is quite unnerving for those transitioning to the off-piste. A matter of personal preference.
Frame bindings are really a ‘slack’ country tool. A gateway to the backcountry but not well suited to the style of extended touring detailed in the bulk of this text. They are easy to use so they still get around. The weight is cumbersome, and the stiffness now equalled in tech bindings. Like 75mm telemark, this kit is in phase out mode.
Skis.
Ski touring or backcountry skis are usually lighter than alpine resort skis. In Australia a preference for shorter and wider yet stiffer planks is emerging. An important consideration is that often you are travelling with upwards of 16kg on your back and what performs ‘packless’ changes with additional weight (hence more float from a wider rig). Sidecut decreases the skis natural turn arc. This is beneficial when navigating tight trees or breakable crusts.. On a budget? In ski manufacturer terms ‘All Mountain’ which is used differently by different brands is generally a good place to start for an entry level Australian touring ski. Burlier than the ‘backcountry’ spec and thus arguably a better fit for the mixed bag of conditions the alps will throw at you.
As mentioned above ‘pattern base’ skis still hold their place in the Australian backcountry in terms of suitability to some touring terrain. Largely due to extended touring inevitably involving sections of undulating terrain. They avail the user of the need to transition to skins or scootch / skate through terrain that on pattern base skis is fun short ups and downs. Downside is that they are slow on the down and sticky (even balling up) on warming snow. On really low angled descents, what a tuned waxed ski will slide on, a pattern base ski is reduced to a walk. If you follow a mate into a deep bowl of 20˚ slopes you cannot expect pattern skis to return you to the top. You will need skins as a compliment in steeper terrain. Alas, the skin glue bonds poorly to the lower surface area of the ‘patterned’ section. If you have the luxury of a quiver, these have their place.
Split Boarding
Whilst the splitboarder will take more time to transition from hike to ride than skiers, the general swag associated with board sports sees to it that splitboarders bring the right ride vibe to the hill which has been sadly missing since telemark got new wave. Splitboarders look like they have an awful lot of fun. Truely the splitboard is not a great tool for skiing with, or slipping downhill with skins on, or climbing steep traverses on hard pack snow or soft sun baked corn. Although the tech is developing, the word is that with stiffer boots and boards are enabling a better uphill characteristics so ask around if you are planning on touring hard. Split crampons, boot crampons and an ice axe are somewhat standard kit, as are collapsible ski poles for hiking. Some clip-in binding rigs are now available which is revolutionising the transition time. If you can’t afford these, you can’t afford to mess around at transition time because in a mixed party (skiers and splitters) you will incur the ire of your skiing tour partners.
The old ‘board and snowshoe’ mode is pretty tiresome and from our experience, the snowshoers usually lag and or expire well before the splitboarder so on most of the tours here in this book, snow shoeing is not a great option.
Skins
Full length skins are essential equipment for travel on slope angles beyond 10˚, regardless of the various set-ups mentioned here. There's a plethora of instructions on how to fit them, plus more on how to maintain them so we need not go into that here. In an emergency I have found when the glue side loses its tack, a clean pot with boiling water used like an iron to smooth over a delaminating section of just plain old tired glue as a ‘rough renew’ works (used on G3 to good effect, cant speak for other brands). Try it if you are in a jam. Basics, keep them as dry as you can, don’t drop them obviously on dust or grass. Standard stuff. If you have a party member on pattern base skis, check they also have skins as most of the tours in this guide will require them.
‘Kicker’ skins are a handy addition for a lot of the terrain here in this guide where it is undulating, just like pattern base skis with the option to ‘kick’ them off.
Waxing
Until you have your system for touring down, waxing is not really a thing. Often having a pretty ‘dry base’ helps side step and general stability when having to navigate tricky terrain. Going fast isn't really the goal out here, remembering that falling is to be avoided. The squeegee bottle polycarbonate wax is popular for particular instances when the snow is really sticky, that said, pouring this petrochemical into the snow (which is what you are doing) is pretty bad environmentally.
Poles
Adjustable poles mostly break. Mostly all the time, or at least before they are retired, and that will usually happen on a tour which is bad for you, and your crew at some point. Do you carry a spare? Two piece adjustable poles are stronger than three. Seems like if they are not over extended they fail less. Grip extending along from the stirrup to mid way is super handy on continuous switchbacks. A spare basket in the tool kit is a good idea. Whippets? Where an ice axe and a ski pole meet. Very handy in accompaniment with ski crampons for climbing to enable a selt arrest if it gets icy and dicey. But that said, carrying a sharp point around at head height when skiing isn't the safest practise. When the time comes, it will make sense when it’s in your hand. See below.
Crampons and Axes
Lightweight aluminium crampons are now pretty strong, for walking, not climbing. Personally I’ve been thankful to deploy them instead of ski crampons in exposed areas. We recommend carrying them if the tour suggests ridgeline travel. It is however an all-in group decision to carry them. A party, with only half carrying crampons, is not really a party for those that don’t. Like ski crampons, pre-empt needing them, and urr on the side of caution, a practice that takes time to perfect.
Ice axes like whippets mentioned above can create as much havoc as they save. Splitboarding with an axe makes perfect sense as a brake (like a whippet for skiers). Also, handy for steep ascents. The kind of terrain covered in the touring descriptions will not require this. The ‘sideshow’ terrain certainly will if it is your intention to ski/ride steeps. Axe / Whippet? You can decide.
Shovel / Beacon / Probe
There’s a lot on this topic elsewhere. Avalanche recue is a rapidly evolving space with yearly updates to firmware and beacon functionality. If the tour you choose travels through or near avalanche terrain you need to not only carry self rescue equipment but also know how to use it, and assess, or better still entirely avoid the danger. A shovel is handy regardless so take that anyway. The beacon and probe are small and light, so pack ‘em in as your essentials. Get avy smart with an Avalanche Safety Training course… avalanches happen.
Pulks
Inuits and antarctic explorers, hauling a sled behind skis is an image synonymous with what many associate ski touring to involve. And with good reason. Getting the bulk of that load off your back helps you ski, saves you energy with the friction coefficient (so long as the snow is hard pack). A pulk vastly improves the carrying capacity of a party. There is always a downside, and controlling a 30kg toboggan as it races past you on a descent is not easy. A liability rather than an asset.
A pulk in Australia usually consists of a standard toboggan with 2m rope inside electrical 22mm conduit stays. A bum bag or other harness worn with the buckle to the back and the side rail of the toboggan furnished in tie downs. There are lighter versions involving 1.5mm HDPE plastic sheet, or heavier production made expedition pulks.
Trial and error is key. I’ve fitted kicker skins to pulks to increase drag on the downhill. We’ve experimented with skier out front as ‘lead’, with a snowboarder as ‘anchor’ on tether behind. This works ok, or better than having a snowboarder as lead. The snowboard turn and the fact that the torso switches 180˚ means it gets even wackier. The harness needs to be able to swivel around the rider? I’ve seen people use 100m ‘para-line’ to haul or lower pulks on headwalls. Also, I’ve seen pulks ‘cut loose’ and career down slopes at warp speed, both intentionally and not. Pulks are terrible at traversing even the slightest slope. Some have grooves along the base to help them track. You can add swing arms of aluminium on the side with a wing-nut as stabilisers?
The key consideration is that the thing will roll. Having a pulk that is able to roll is a good thing. Packing it such that your gear doesn’t get smashed up is critical. What I’ve found is that a waterproof 50lt duffel bag with shoulder straps, with a closed cell mat liner inside (handy as mess tent chairs), packed with all the ‘camp kit’ like tents, mess tents, stoves, food and fuel (making sure they are not leaking), Things that can get wet / stay wet and still work is pulk bag gear. Using nylon ski straps to fasten the duffel bag within its tiedowns and sliding a HDPE sheet on top at front and back gives you a rollable pulk that sheds snow and has about enough drag to at least be controllable. If it's icy you can add your skins to the top side and put your kicker skins on the bottom (tied to the forward tethers). If the pulk needs to be carried in or out below the snowline then flip the duffel and use the shoulder straps. You can wax the bottom for extra slide once it starts getting haggard from scratches. Pulks have a tough life. That's how they like it. It takes time to get the process nailed. Share the hauling as the pulk is for everyone. The toboggan pulk is a great stove platform for food prep, you can cut 4mm ply sheet to fit as a chopping board. Google it… and get crafty.
Familiarization & awareness
Get your party together, have a general destination agreed upon based on the skills of the party even months ahead. Then in the days before as the weather outlook confidence increases, review the guide and choose a route or tour based on the outlook, not the lofty desires of the leader, but the pragmatic reality of what you will face beyond the trailhead. Exposure and elevation are the key factors and the difficulty rating of the tour given the time that the party has available.
The Freezing Level
The freezing level is the physical elevation below which snow melt occurs. This will vary with the weather outlook and is easily assessed via web pages and apps. A cold southerly airstream (Storm Cycle) will often depress the freezing level down to around 1000m for periods of a day up to almost a week in mid winter. With the influence of a high and the associated northerly airflow this freezing level can rise to over 2500m. Everything is melting!!!. Frequently the freezing level will hike to 2000m around 1pm and then descend to 1400m by 4pm. Often a cycle that prevails for days on end. This is a melt freeze cycle and is the phenomena that creates surface ice crusts.
Storm Cycles
In Australia we experience three common storm cycles. The categorical basis for them is the origin of the airflow. We have ‘westerly front trains’, ‘Southerly Outbreaks’ and ‘Easterly Blobs’ or at least that how we at the MSC refer to them. As we are talking about weather, treat these definitions loosely as everything and anything can happen. A westerly train can collide with a southerly outbreak and wobble off as an easterly blob.
Advancing storms and prefrontal rain.
Often, preceding a storm, a strong northerly airflow develops. The wind associated with this can often be as severe or more so than the front itself. More than once we’ve witnessed near misses from falling trees on trails in the snowgum forest on ridges. Usually the trees dump all kinds of debris so you have to hope for new snow as the surface becomes a minefield of tripping hazards. As the advancing front mixes with the warm upper level airflow it creates rain. Usually not for long, and not the worst thing as we’ve found it helps to create a better bond between the new and old snow and mend avalanche hazards early in the cycle. Rapid condition changes include 120cm of snow melting down to 60cm with prefrontal rain and then with the change falling snow deposition returns back to 120cm over a 48hr period.
Westerly Front Trains
A front train is a series of low pressure ridges or fronts that sweep across the bottom of the continental high pressure ‘blob’ (cell) and have enough influence to push it north (at around the longitude of the Great Australian Bight). With each successive front to push through the ‘train’ gains momentum. Some days you can track via a barometer oscillating pressure down and up indicating waves of fronts. With weather intermittently ‘wild and mild’. Blizzards and zero visibility, to mild and almost clearing. With this on the forecast you are in for a wild trip with snowfall associated and can last in some cases for 5 to7 days. Records indicate that this pattern or characteristic is decreasing due to climate change through a strengthening of the continental high pressure system (warmer). The frequent small fronts deposit snow gradually which is great for forming a stable snowpack. 5 - 10cm a day for a week is perfect safe snow accumulation rates that’s less likely to avalanche. Although we always find weak layers within snowpack on grapple and rain crusts during these ‘train events’ so always stay vigilant of avalanche hazard on steeper terrain.
In September / October, as the days get longer and warmer, a front that advanced onto the continent at dawn and arrived at the mountains at mid afternoon will be an airborne cauldron of mixing warm and cold air so expect violent results. Rolling thunder in the valley announces their arrival, bad visibility as they ‘wedge in’ and a really mixed bag of precipitation from stellars to rain, ‘gorilla snot’ and grapple all in a couple of hours. These are Spring Storms.
Southerly Outbreak
These beasts, sneak around under the CHP blob and then push up into south eastern South Australia, slowly tracking in an easterly direction and bringing cold antarctic oceanic moisture, fast, across the state, let alone the mountains. Like a clean sweep the mountains will turn white to low elevation with snow down to sea level in Tasmania, 500m in Victoria and 700m in NSW. Such outbreaks are capable of delivering 50cm ‘at the stakes’ (resort measures) which can be easily 1m + found as drifted snows on leeward aspects. Plan to be where you want to be before this arrives. Plan to have enough supplies to not need to move for days… Stay low, find good leeward shelter amongst the gums. Prepare for the wind to shift to the through south to the east as an assessment of the shelter you find. Expect extensive drifting and be prepared to set alarms to dig out tents every 3 hrs. Once the wind has shifted to the south east (could be one day could be five) the worst of the outbreak is behind you. Within a day the storm will have run its course.
Whoa… hold on?
Heading out into a southerly outbreak is nuts? You can’t ski much because you can’t see much and the avalanche hazard is likely considerable to high. You will get cold and wet real quick, worse still if you get lost or there are no huts??? Walk all that thinking back and ask yourself whether you are really training for an unsupported polar crossing, or if you are out for a bit of fun. Plenty of people have marched out into blizzards only to have tents shredded, rescues prevail and then sell all their stuff the following week, utterly terrified. No messing around, these mountains in this weather pack a punch. Look for the ‘Aim Low - low elevation tours’ in the guide, which provide alternative itineraries for when these conditions prevail.
Southerly Transportation events
As these storms subside, as they track east toward the tasman sea, it is not uncommon for a stiff south and south easterly wind to develop. This strips the upper slopes of the new storm snow and redistributes it onto slope lee to the south and east. Dramatically changing the wind slab avalanche problem characteristics over only a matter of hours. This too has caught a few people out.
Easterly Blobs (slow moving depressions)
Personally I don’t even want to write about these. In fact I’d rather pretend that they never happen, yet alas they do. So dang it… here we go. As Drew Jolowicz says: ‘Nothing good comes from the east!’ and that guy hunts pow for a living. Easterly blobs are weird and inconsistent and hard to define yet they occur (increasingly). They flip the other phenomenas characteristics on their head. They start cold and get warm. Or not at all, they can start warm and then get wet with temps toeing freezing line. Excuse me, but it's a shit show. Hard to predict, slow moving (not usually associate with strong wind) and usually develop into a storm somewhere north of the ranges (Canberra) as they swing from east to south east and travel in a northerly direction. Suck it up, its just an east coast blob!
Melt / Freeze cycle
After a storm cycle, as the freezing level climbs up and the surface starts to melt and then refreezes, a crust forms. Dawn on day one of this melt freeze cycle is usually horrible, presenting a non supportive ‘toffee apple’ crust atop soft fresh snow through which control of skis or boards downhill is very hard, until the warmth (usually solar, or also rain) softens the surface for a window of time before the crust recovers its frozen state around mid afternoon (or earlier on shaded aspects). Day two through to day five the crust gradually develops to become ‘supportive’ and this creates an enjoyable skiable base again. The inputs of crust formation involve aspect, the freezing level (air temp), and the temperature of the snow beneath the crust. If the preceding storm cycle was cold (as low as -9˚ for example) then crust recovery is quicker and harder than if the storm cycle was warm (-1˚ is warm for a storm). The detail around this is important as it has been the cause of many close calls and critical incidents, some fatal. And you need to have it as a serious consideration. And it is something that can be forseen in the outlook.
Rain crust events.
Scenario: Following a storm, with a cold snowpack, a solid melt / freeze crust receives rain. Not much. Only 20mm. And then the cycle kicks in again. An absolute disaster top down. The range is converted into an undulating ice rink. When this is a problem, we need to dial back our skiing aspirations and explore other alpine pursuits like travelling with crampons or Ice climbing even. It can take days to ‘corn up’ and that’s on the sunnies aspects. In the shade this surface condition can persist for weeks. Even a controlled fall with the right equipment is hard to arrest, with grave consequences.
Big Rain
Or conversely, it rains for days...warm rain, and melts everything. Including the snow bridges over rivers and creeks you need to cross or have already crossed. Which are now swollen torrents. Problem.
Valley Effects
Imagine the airflow as it races toward the mountains, the geography of the valley course becomes a ‘wind’ river. The air is funnelled, and intensified and condensing through its constriction (orographic lifting) as it eventually ascends toward the headwaters and then spews over the ridge into another leeward valley beyond. As it ascends two important things happen. The geography changes the direction (veering or backing) of the wind. Important in the assessment of localised wind direction and snow deposition patterns. There is a lot in this and it's beyond our scope to cover in detail. The key point is that the valley effect of shifting wind direction can be significant., Whilst the ‘prevailing weather’ may be said to be from the south, at your location it may actually have veered 90˚ or more and may be ‘apparent’ as a north westerly or south easterly. This changes your assessment of where leeward shelter is, or where wind slab avalanche hazards may be forming. This is known as the local characteristics and are the result of your physical relationship to the geography of valleys below.
Example. In Victoria, Mt feathertop sits on a ridge between the Ovens and West kiewa valleys. The funnelled wind from over 60km in each respective valley races past either side. In the Alpine the summit presents a cornice on South East Face, and the ‘prevailing weather’ is south westerly. Indicating that the valley effect on the wind there veers 90˚ (‘veering’ is clockwise / ‘backing’ is anticlockwise). On the ridge of the headwaters of the ovens ubiquitously known as ‘Blowhard’ the ridges there form cornices above south faces. Hence a veering of 130˚ from the prevailing airflow (at elevation 2000m). Known areas where this phenomena takes place are detailed in the book to help understand the ‘big picture’ against what you are seeing. Mount Fainters south face shares the same aspect and only 7km distant across the West Keiwa is entirely cross loaded, with no ridge top cornices, and instead huge vertical drifts. The valley effect ‘backed’ the wind 90 from West to North in the same storm. Reading the terrain and experience are the key to advancing local characteristic knowledge. When you have, you have unlocked the art of ‘finding stashes’ and recognising avalanche hazards in the same leap. Do an avalanche safety course…
Rime Ice
Tiny fast moving super cold moisture particles that collide with an object stick to that object, then more stick to it, and on and on until the windward slope (where this cold fog is blowing) erupts into what appears as a vast field of frozen cauliflower forms. It's pretty standard fare for the windward aspects of the Australian alpine. With sunny days it decomposes. When you find it at least you know where the wind came from in the last storm in the area you are in.
Avalanche hazard in Australia
What's an avalanche?
An avalanche is a rapid flow of snow down an inclined slope such as a mountainside or even the roof of a building.
Avalanches vary greatly in size. In North America, they use a size scale of 1 (small slides generally not deep enough to bury a person), 2 (enough to bury a person and thus potentially fatal) through to 5 (major snow avalanches that could bury or destroy a village). While we don't often use this scale in Australia, the avalanches we tend to see are usually size 1 or 2 on this scale. This is mostly due to the amount of snow we get (1 – 2 metres) and the size of the avalanche paths in Australia
What causes avalanches?
Avalanches can be triggered by natural forces (e.g. the pull of gravity on a steep slope or warming temperatures destabilising the snowpack) and/or by human activity (e.g. the load of a skier across the snow, or a deliberate trigger). They occur when one layer of snow slides off another (surface avalanche) or the whole snow cover slides on the ground (full-depth). To occur, they need a snow-covered slope with a cohesive slab of snow resting on top of a weak layer of snow; and a triggering mechanism.
Snow layers with different compositions
There are a number of factors that lead to an increased risk of avalanches, although they do not necessarily guarantee a slide will occur. As snow falls during the season, the snow accumulation (or snowpack) is made up of different layers. The physical composition (e.g. thickness and texture) of these layers can vary within the snowpack affected by the weather conditions during as well as after the snow accumulated. This changes the structure of the snow crystals which can vary from six-pointed crystals, to needle shaped crystals, to rounded crystals or even to facets (square angular ‘sugar’ crystals).
Layers with different compositions can occur when:
• fresh snow falls on snow that has recently melted and re-frozen as a slippery, icy layer;
• fresh snow which includes freezing rain or graupel;
• surface hoar (a type of feather-like frost on the snow) develops with fresh snow falling on top which creates a weak air-filled layer;
• snow within the snowpack changes with ice crystals becoming rounded or developing into facets creating weaker layers; or
• melted snows seeps through the snowpack, making the lower layer slippery.
In these cases, the layers may have weaker than usual bonds with each other, meaning the snowpack has greater instability.
Large accumulations of snow and avalanches
Avalanches are most likely to occur after a fresh dump of snow, particularly a large fall of snow in a short period of time. The snowpack may become overloaded by the weight of the new snow, ready for an avalanche to be triggered, either naturally or by a person. The risk increases even more if the new snow is falling on top of an icy layer or surface hoar which makes it difficult for the fresh snow to bond to the older layer below. Large and unstable accumulations of snow may also occur on the sides of rooftops and other inclined surfaces.
Wind and avalanches
Wind can transport falling snow or surface snow to create accumulations of snow with snow generally transported to an area of the mountain where it accumulates. These deposits can be up to tenfold the snowfall and so can increase the risk of overloading the bond with an underlying snow layer, increasing the risk of instability. This is most common on lee (downwind) slopes.
Wind can also form unstable snow features such as cornices—an edge of snow, often overhanging, on a ridge or crest of a mountain or sides of gullies. While they can be beautiful, cornices can also collapse unexpectedly.
Sun exposure and avalanches
Sun exposure increases avalanche risk by changing the temperature gradients in the snow layers, which then creates instability. Caution should be taken during springtime or unusually warm bursts during winter as the layers can also release as a wet slab of snow.
Avalanche Terrain
Terrain plays a central role for the occurrence of avalanches. This includes the angle of the slope: most avalanches that kill people are on 35–45 degree slopes (where skiing is still possible) and slope aspect: a north-facing slope may be more unstable than a south-facing slope since it has sun exposure to melt the snow
Surface type or features: some slopes can be self-supporting (concave) while others hold more tension (convex). Features such as trees and rock outcrops can also create trigger points.
When do they usually occur?
Avalanches can occur at any time of year when a snowpack is present, typically winter and spring in Australia. Importantly, they can occur when the weather is sunny, not just in storm cycles.. The weather system that led to instability in the snowpack (for example a large fall of fresh snow) may have passed but the risk remains for usually days afterwards. Skiers and boarders should allow sufficient time for the new snow to bond to existing layers and understand how to assess the risk of avalanches.
What actions should I take?
If avalanches or the conditions that lead to them are possible, make conservative decisions when choosing the terrain to travel and ski on. Bring the right equipment (transceiver, shovel, and snow probe) and know how to use it (by doing an avalanche safety training course). Never go out into avalanche terrain alone (or alpine terrain for that matter) and let someone know where you're going and when you'll be back.
Whiteout - Navigating in low visibility
Driving snow and wind can obliterate every sense outside the immediate four meter vicinity of the party huddle. And that is about as close as you will need to stay in order to travel. Maintain a close huddle on the ski trail, the leader paying close attention to keep the team together. Goggles that work are essential. It get hectic once the party starts groping through the terrain. Using navigation ‘handrails’ such as creeks and rivers or pole lines works (In reasonable visibility a ridge can also be a ‘handrail’) or get amongst the trees. Making sure you keep together as a unit, particularly on the downhill. Whistles help on descents with the leader and sweep issuing short alternating reports. If the leader cant hear the sweeps report he stops. Where snow poles exist, an old technique of using 100m para chord to tether a party works to grope between the poles. Shock chord perhaps? In whiteout you are always safety skiing any descent.
Safety Skiing
As above in poor visibility or similarly on bulletproof ice and breakable crusts there are times when you need to heed the conditions. It’s not the time or place for linking turns down the slope. Its time to safety ski. Imagine skin traversing in reverse. A gentle downhill traverse, followed by a turn under which the leader shuffles back below and waits for the party whilst ‘spotting’ for falls at the turn. The leader during her/his descent must remember that the following party will track faster on the made trail and to slow them down, lessen the angle of descent. The party regroups and continues. Establishing the turn point on the safest available terrain, above trees or grass literally as a ‘safety net’ is not bad. It’s not sexy but it is safe.
Day touring
Day touring is the ‘easy-in’ and perhaps, the best approach would be to tick off all the day tours in this guide before attempting an overnight trip?
Here are 10 basic pointers to remember:
Fitness
Ski tours are an endurance sport. They make your heart, circulation and muscles work hard, so good health, a high fitness level and an honest assessment of your capabilities are required. On the mountain avoid having to rush and adopt a pace that avoids anybody in your group getting out of breath. Make sure you pace yourself and have enough energy for the return journey. Regular endurance and strength training make ski touring and mountaineering more enjoyable by improving your fitness. If you have been out of training for a while, after a sickness or at an advanced age, an examination by a sports physician can help you assess your physical limits.
Do your homework
Maps, guidebooks like this one, the internet and experts are good sources of information about routes, distances, differences in altitude and the current conditions. Pay particular attention to the weather forecast, as cold conditions, strong winds and poor visibility greatly increase the risk of accidents. Also plan alternative routes and find out the emergency number for the areas’ ski patrol, police rescue (000) and log intentions with your ski patrol or park rangers. While you are at it, check and make sure your Ambulance cover is current.
The decisive question when planning a tour: Do the current conditions allow for my tour destination? Bear in mind that the plan is a mental draft which must be reassessed continuously on tour. Even the most careful plan is worthless if the fixation on a destination is strong to the point of not factoring in new information gained on the spot. Planning an alternative makes it easier to react flexibly to adverse conditions.
Be prepared
Make sure you have the right equipment for winter conditions and that your backpack weight is fit for purpose and tour duration. For avalanche rescue, an avalanche beacon, shovel and probe are standard equipment as well as a first-aid kit, bivouac sack and or bothy bag, always a head torch, mobile phone on ‘Airplane mode’ or switched off to save batteries and personal location beacon (PLB). An airbag system increases the chances of survival in the event of avalanche however it can provide a false sense of security. We recommend 3 antenna avalanche beacons and metal avalanche shovels. For ice conditions crampons and ski/split crampons, ice axes / whippets are prudent. Packing both is never a bad idea. Assuming you know how to use them. Important point: Even though the technical avalanche emergency equipment is being improved continuously, responding efficiently and safely in the case of emergency (coordination, emergency call, probing, shovelling, first aid) must be trained and practiced.
Do more homework
Before going on tour, find out the details regarding alpine hazards. The avalanche danger: Which level? What? Where? Pay particular attention to information about the danger level (1-5), about avalanche prone locations (Where is it dangerous today?) and the danger patterns (What is the main danger today?). New snow, wind-drifted snow, old snow (persistent weak layers), wet snow and gliding snow are the 5 typical avalanche problems. Extensive ice sheilds, rime and crusts also present considerable hazards. The Advisory will outline the predominant source of danger. Typical avalanche danger zones are gullies and bowls filled with wind drifted snow, lee slopes adjacent to the ridge line, shady slopes, sunny slopes, transitions from shallow to deep snow. Ice can prevail anywhere and in some cases everywhere.
Self assess
Applying your research to ‘in the field’ observations will give you a keen sense of whether the forecast picture matches your own ‘on mountain’ reality. Make sure you recognise the leeward aspects, the windward aspects and the associated avalanche and ice hazards respectively. If these are consistent with your research, your hardwork has paid off. If not, you’re starting from scratch and will be assessing hazards based purely off your own observations. It may be time to reasses and change your plan. If you see warning signs of instability weigh these against your research or preconceptions with regards to your intended route.
Take breaks and soak up the vibes… quickly and often.
Liquids, energy and breaks are required to maintain performance and concentration. Hot isotonic drinks are ideal for quenching your thirst and keeping you warm. Continually get your bearings (“I know where I am”) and be wary of following any existing tracks. Drink and eat (carbohydrates) about every hour in order to refuel your body. Breaks shouldn’t last longer than 5 minutes to keep the body at “operating temperature”. Make sure you choose locations for your breaks that are protected from alpine dangers like avalanches, rock fall or buried flowing water. Preferably sheltered from the prevailing elements.
Space Out!
Spacing out reduces the load on the snowpack and contains damage. Spacing distances of 10m between party members when ascending a steep slope also makes kick turns more comfortable. On downhill sections, always maintain a distance of at least 30 m. Ski down very steep slopes one by one. Distances also prevent collisions while descending and limit the damage: in case of an avalanche, chances are that fewer skiers will be buried. Always avoid skiing slide paths above other parties.
Avoid Falls
Falls, slides and collisions with snow gums on downhill sections are the main cause of accidents on ski tours. Good skiing technique and a speed that matches your ability and the conditions reduces the risk. A ski helmet protects against head injuries. More than two thirds of all accidents on ski tours happen when skiers fall while descending. Slides on ice, leading to collisions with trees or falls from cliffs is a very serious hazard. Comparable to that of avalanches. For the snowpack a fall is an enormous “shock”: 5 to 7 times the body weight impacts on the snowpack and can trigger avalanches.
Go in small groups
Small groups (up to six people) are safer. Communication with other winter sports enthusiasts and mutual consideration prevents dangerous situations. Stay with your group. Inform someone you trust of your destination, route and return time (including Ski Patrol or Parks Intentions forms). Important note for solo skiers/snowboarders: minor incidents can turn into major emergencies. The ideal group size for ski touring is around 4 people, for guided tours the head count 8+1 has been established as a recommendation for the maximum group size. In far bigger groups, chaos and frustration looms large due to difficult communication, lacking control and compounding delays.
Respect the mountain environment.
The mountains provide a valuable environment for experiencing wilderness. Enjoy this freedom! Be considerate of native animals, those you can’t see who live under the snow, or those who share our huts. Respect protected / prohibited areas and seasonal road closures. Tread lightly on the ground, particularly exposed flora on ridges and summits which whilst only tiny can be decades old, and working hard at consolidating otherwise erosion prone terrain. Use public transport or car-share to get to your starting point. Support the alpine clubs in their endeavours to conserve your access to the unspoilt mountain environment. Regrettably it still does not go without saying: "Keep our mountains clean, pack out all trash!". We strongly urge you carry out everything. In more remote areas where public toilets do not exist, familiarity with the use of ‘Poo tubes’, a personal feacal storage container, is a mandate of the backcountry community.
Extended touring
With everything outlined above, and having the confidence in your gear gleaned from a handful of day trips, lets try overnight and extended
Shelter
This can mean a lot of things to a lot of people. ‘Hard nut’ alpinist will be content with a shallow ditch or a ‘fox hole’, a bivvy bag, sleeping bag and mat washed down with some jet boil pot noodles and enjoy 16kg packs all tour. Others will wallow under a 22kg pack complete with a four season tent, -10 sleeping bags, luxury mattresses, four course meals washed down with aperitif. As a party you should establish if you are in for an Alpinist style tour or a luxury affair tour, or an exact increment between the two. You want both, right? And the key to this is sharing and caring… there’s no ‘I’ in teamwork!
Snow Caves
Burrowing in to the snow provides easy functional shelter. Based on the assumption the snow is deep enough and supportive enough to provide space, and structure (Powder snow is hard work, as is rotten sun melted porridge snow). The extent to which you dig depends largely on the duration of intended stay and the weather conditions. The key tools being an avalanche probe and a shovel.
Digging Down: The minimum is a trench, a human size grave like trench, deep enough to get out of the wind. You can use the blocks of your excavation to build a wall on the windward side of the hole for extra shelter. You can dig a deep hole at one end for your feet to sit up in the trench. Onwards it goes as you excavate a kitchen area, then the chillax zone and the apre bar…. Digging keeps you warm.
Fox Holes are when you simply dig a human size tunnel into a drift. With a team, a fox hole can turn into a snow cave, which turns into a frozen hacienda complete with gear room at the entrance, a kitchen and sleeping shelves… All assuming you have the depth and height to be structural. Use an avalanche probe to suss this out before you find a boulder in the middle of what was to be the cave. Important: Suffocation occurs in snowcaves. Buried under a roof collapse, or poisoned by carbon monoxide. Ensure the roof is thick enough to support its span. And always keep the doorway unobstructed. If it is snowing (usually drifting heavily given the best snowdepths themselves are drifts) or forecast to, schedule hourly excavations of the entrance all day, and all night. If it rains and the percolation of rain melt is apparent within the caves thinnest front area it is most certainly time to leave…
One crafty emergency option when there is no drift available, and you are in deep snow is to throw your packs and skis in a pile. And then bury these with snow, packed down with the back of the shovel to a thickness of 50cm. Then from the side burrow underneath the pile to extract the gear. This provides the beginning of a shelter and can be done pretty much anywhere. Probe to ensure sufficient snow depth first. It can also be done to create the entrance of the snowcave before any construction commences.
House keeping. The snow will turn to ice through the heat of the people within. Take time to ensure that the ceiling is smoothed off as any points turn into annoying dripping semi frozen stalactites. All of this is cold work. You will be covered in snow during the process so layer up before you start, particularly on the hands that are moving blocks of snow. Change digging and block hauling roles and keep moving until you are in and shelter is created.
Tents & Sleeping gear.
I’ll share the system that I’m using and end with that. Theres heaps to fine tune in this department. In general its foolish to head out without some kind of guaranteed shelter. Similarly, on many of the tours in this guide the opportunity to live in huts but sleeps outside exists, so a ‘fit for purpose’ system is what you are looking for. Bombproof, but light.
I’m travelling with a single layer pyramid style tarp tent with a footprint of 2.5m square. And all the food preparation gear and fuel for 3 or 4 people for 4 nights. My other three party members are carrying a 3 person tent divided out as poles, fly and inner each. They also have the meals. In all, each person is carrying less than 2kgs of shared ‘overnight’ equipment. At camp this affords us a mess tent to gather with sleeping quarters for one, and tent shelter for the whole party if needed, or a spacious ‘tip to toe’ sleeping area two. The tent is a long tunnel tent, simple, quick construction (google Hilleberg Kaitem) which we all chipped in for years ago. We are camped in the second last row of snowgums below the alpine. The pyramid is tethered from a branch above. The pyramid tent doubles as a bothy bag for quick breaks in exposed places. If we decided to bring the pulk, all this equipment would be stowed in that. We used to sleep up high on the ridges and wonder at the spectacle of the colours of dusk and dawn, but we also got worked up there for days, pinned in the tents, unable to move as the structures disintegrated around us. And let’s not mention the roulette of electrical storms. If the weather is 100% we can still stay up high, but generally nowadays it’s just below treeline by default.
Beyond this, the additional personal items extends to sleeping bags. I use two. I have a +5˚ bag inside a -0˚ which gives me options perhaps a -5˚ used together.. If it’s super cold I can use both and sleep in my down jacket and fleece. If we have the shelter of a hut I can use just the big bag, and in summer I take just the light bag. Saved on having to buy a purpose specific -10˚ rated sleeping bag. This is all packed in a lightweight breathable bivvy bag with an R5 rated inflatable mat. The light sleeping bag is a great addition to the bivvy bag for an emergency. My guilty luxury is an inflatable felt covered pillow which packs down to the size of a tennis ball.
Huts
‘Emergency Shelter Only’ is the unequivocal statement that you will read on entering every hut in the highcountry. Obscured perhaps by the drying wet weather gear and low steam of the boiling pots. Shelter in this instance points squarely at sleeping. In short, to be clear, if the proverbial has hit the fan, and you are without adequate overnight accommodation then sleeping in a hut is allowed. The instances would be that you had somehow lost your pack when perhaps the pulk broke loose, or you had a day trip planned and something went wrong or you came back to the hut and your tent had blown away, as just a few examples. Not carrying or owning appropriate equipment is not an excuse to set up in the hut and call it home. Alternatively if something has gone wrong, then it’s incumbent on the other people using a hut to make space for the unfortunate party. They now have all the right to the space.
Hut etiquette requires that there’s no ski / split hardware inside, boots are kicked free of snow at the door, lights out at 9pm, firewood must be collected and stocked enough for one night of fire (including kindling) on departure. Don’t leave anything behind, no food you don’t want to carry out, no chairs or weird shit that you thought the hut needed like utensils. Leave it cleaner and tidier than you found it. Don’t mess with or take emergency rescue equipment unless required, particularly the furno sleds and lockers.
Provisioning
Again, like the tents & sleeping section we will provide examples through recipes. Each person brings a meal, or two depending on how long you’ll be out for. The fundamental consideration is that you are going to be ripping through energy on an extended tour (3200 - 5000 calories per day, or twice the normal of what you usually consume as a rule). So the key to success is compact and lightweight high calorie cuisine by night, fluids and hydration and carbohydrates in the morning with almost constant snacking during the day, and a picnic if required. So how this works for me are three staple meals which are all a way of dressing up the best backcountry protein I’ve found in dehydrated mince. Usually beef, lamb or kangaroo.
Usually in early june I’ll head to the shops and do commercial quantities of this stuff. I can dehydrate around 3 kilos of the good stuff in the standard domestic food dehydrator. The prep time is around an hour with the simmer, per dish. And 8 hours in the dehydrator. And then you are done for with cooking for the season.
Medical
How to use this guide.
Navigation